p5.gui
p5.gui magically generates a graphical user interface (sliders, color selector, etc) for each of your variables. Behind the scenes it uses other libraries such as Quicksettings (and in the future also DAT.GUI) to do all the hard work.
You currently need to include both p5.gui.js and quicksettings.js in your p5.js sketch.
Usage
Explore the examples for how to use it …
Add Global Variables
Create your variables
let myNumber = 100;
let myColor = color(255, 0, 0);
let myChoice = ['one', 'two', 'three'];
Create a new GUI with a label
var gui = createGui('My awesome GUI');
Add gui elements for your variables:
gui.addGlobals('myColor', 'myNumber', 'myChoice');
p5.gui inspects the type of your variables and magically displays the corresponding GUI elements.
An example can be found here.
Use Magic Variables to control individual sliders
Once you have created a variable called myNumber you can control the details of the slider like this:
let myNumber = 100;
let myNumberMin = 0;
let myNumberMax = 1000;
let myNumberStep = 10;
gui.addGlobals('myNumber');
p5.gui will magically pick up variables ending in Min, Max and Step to control the appearance of the slider.
See here for an example.
Use sliderRange() to control slider creation
If you want explicitly control the range of a couple of sliders you can also use the sliderRange(min, max, step) command.
This will set the range for all future calls to p5.gui.
let a = 100;
let b = 120;
let c = 120;
sliderRange(0, 1000, 10);
gui.addGlobals('a', 'b', 'c');
See here and here for an example.
Pass params as objects
If you want to keep all your parameters in a single place, you can wrap them into an object like this:
let params = {
	myNumber: 100,
	myColor: [255, 0, 0],
	myChoice: ['one', 'two', 'three'];
};

gui.addObject(params);
Slider Magic works just as with global variables:
let params = {
	myNumber: 100,
	myNumbeMin: 0,
	myNumbeMax: 1000,
	myNumbeStep: 10
};
See here for an example.
Pass your sketch in instance mode
If you want to run your processing sketch in instance mode, you need to pass your sketch to the createGui function. Here’s a simple example:
let sketch = function(p) {

	let div;

	let params = {
		r: 500
	};

	p.setup = function() {
		div = p.canvas.parentElement;
		p.createCanvas(div.clientWidth, div.clientHeight);
		gui = p.createGui(this);
		gui.addObject(params);
	};

	p.draw = function() {
		p.background(220);
		p.ellipse(p.width/2, p.height/2, params.r, params.r);
	};

	p.windowResized = function() {
		p.resizeCanvas(div.clientWidth, div.clientHeight);
	};

}

new p5(sketch, 'sketch1');
new p5(sketch, 'sketch2');
new p5(sketch, 'sketch3');
new p5(sketch, 'sketch4');
You can find this example here.
One sketch, many guis
You can just create several guis, and position them individually:
let gui1 = p.createGui('My 1st GUI');
gui1.moveTo(50, 50);
gui1.addGlobals('a', 'b', 'c');

let gui2 = p.createGui('My 2nd GUI');
gui2.moveTo(windowWidth - 50, 50);
gui2.addGlobals('e', 'f', 'g');
See here for an example.
Many sketches, many guis
When using Instance Mode (see above) you can can easily create several sketches, or versions of a single sketch.
See here for an example.
Color Modes
You can use the colorMode() function to change the default color mode used to interpret colors when creating the GUI.
Examples
Links
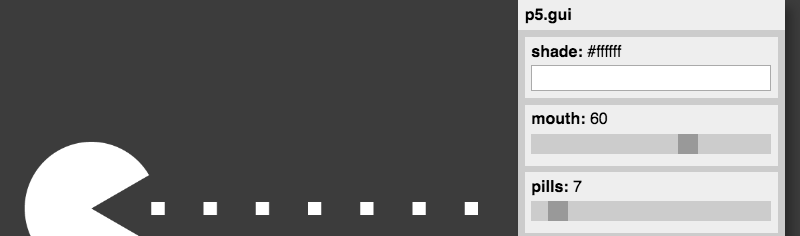
- Codepen Template feat Pacman
Licensing
![]()
p5.gui is licensed under the MIT License.
This repo also includes code from other libraries:
- p5.js is licensed under LGPL 2.1
- DAT.GUI is licensed under Apache 2.0
- Quicksettings.js is licensed under MIT